• Hello game master! Welcome to our growing community. Please take a moment to Register (top right button, see how: Slides).

    If you use Campaign Logger, you can use the same login details - we've linked the app to this forum for secure and easy single sign-on for you.

    And please drop by the Introductions thread and say hi.

Living Guide to "Flexible" Minis

JochenL

CL Byte Sprite
Staff member
Adamantium WoA
Wizard of Story
Wizard of Combat
Gamer Lifestyle
Borderland Explorer

JochenL

CL Byte Sprite
Staff member
Adamantium WoA
Wizard of Story
Wizard of Combat
Gamer Lifestyle
Borderland Explorer
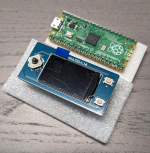
  • Ingcool Raspberry Pi Pico Board with Pre-Soldered Header, Based on Raspberry Pi RP2040 Chip, Dual-Core ARM Cortex M0+ Processor with up to 133 MHz, Support C/C++ /Python
  • Coolwell Waveshare 1.14 Inch LCD Display Module for Raspberry Pi Pico, Embedded ST7789 Driver, 65K RGB Colours, 240 × 135 Pixels, Using SPI Bus
 

JochenL

CL Byte Sprite
Staff member
Adamantium WoA
Wizard of Story
Wizard of Combat
Gamer Lifestyle
Borderland Explorer
Estimated setup time: 30 to 60 minutes for a developer, double that for a newbie.

I used this guide to install the development environment for C/C++ on Windows.

My changes:
  • Use drive D: instead of C:
  • Use the current versions of the linked installers
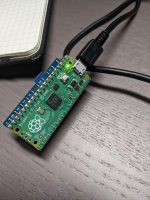
The demo "blink" worked!

1665557140417.png

If you encounter problems or have any questions, post them here. I will try to answer them.
 
Last edited:

JochenL

CL Byte Sprite
Staff member
Adamantium WoA
Wizard of Story
Wizard of Combat
Gamer Lifestyle
Borderland Explorer
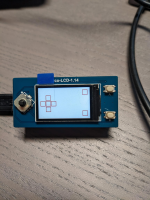
Setting up and testing the LCD (about 30 minutes)

I used this guide: https://www.waveshare.com/wiki/Pico-LCD-1.14#Download_Demo_codes
...and encountered the first problems!

To fix this, so it works on Windows with the guide in my previous post instead of:

Bash:
mkdir build
cd build
export PICO_SDK_PATH=../../pico-sdk
cmake ..
make -j9
cp main.uf2 /media/pi/RPI-RP2/

I deleted the existing build folder and executed:

Bash:
mkdir build
cd build
cmake -G "MinGW Makefiles" ..
make
copy main.uf2 E:\

E:\ is the auto-mounted drive representing the Pi on my system.
If you installed "blink" on the Pi (like me), it will not automatically show up in Windows as a drive. Disconnect USB, hold the BOOTSEL button on the Pi, and reconnect USB to get it to show up as a drive again.

1665644263727.png
 

JochenL

CL Byte Sprite
Staff member
Adamantium WoA
Wizard of Story
Wizard of Combat
Gamer Lifestyle
Borderland Explorer
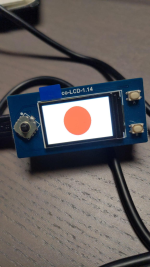
My first own drawing: Japanese Flag (30 minutes)

Based on the code in LCD_1in14_test, I created the following function:

C:
int draw_image()
{
  DEV_Delay_ms(100);

  if (DEV_Module_Init() != 0)
  {
    return -1;
  }

  DEV_SET_PWM(50);

  LCD_1IN14_Init(HORIZONTAL);
  LCD_1IN14_Clear(WHITE);

  UDOUBLE image_size = LCD_1IN14_HEIGHT * LCD_1IN14_WIDTH * 2;
  UWORD *back_image;
  if ((back_image = (UWORD *)malloc(image_size)) == NULL)
  {
    return -2;
  }

  Paint_NewImage((UBYTE *)back_image, LCD_1IN14.WIDTH, LCD_1IN14.HEIGHT, 0, WHITE);
  Paint_SetScale(65);
  Paint_Clear(WHITE);
  Paint_SetRotate(ROTATE_0);
  Paint_Clear(WHITE);

  Paint_DrawCircle(LCD_1IN14_HEIGHT / 2, LCD_1IN14_WIDTH / 2, 50, RED, DOT_PIXEL_5X5, DRAW_FILL_FULL);

  while (true)
  {
    LCD_1IN14_Display(back_image);
  }

  free(back_image);
  back_image = NULL;

  DEV_Module_Exit();

  return 0;
}

The code needs further examination, e.g., why is the call to Paint_SetScale necessary?

At least, it works for now:

1665985855753.png
 
Top